6 Step Entry Confirmation Rules Traders Can Copy

Entry confirmation means waiting for a second, independent signal to validate a trade before you risk money on it, not just spotting a pattern and clicking buy. The one rule that matters most: never enter until your stop-loss is set, your risk-per-trade is calculated in dollars, and at least one confirmation from a different signal category agrees with your primary trigger. Skip any of those three and you’re gambling on a hunch, not trading a plan.
TL;DR:
- Confirmed entries require a second, independent signal from a different category such as volume or momentum, not just multiple chart patterns.
- Proper risk management mandates defining stop-loss locations and converting those levels into dollar risk before entering a trade.
- Checking higher-timeframe alignment and setting predefined entry, invalidation, and liquidity conditions are crucial steps in a reliable confirmation process.
- Using limit orders instead of market orders during confirmation reduces slippage and improves trade execution quality, especially in low-liquidity markets.
- Building and backtesting personalized confirmation rules ensure discipline, improve win rates, and prevent emotional or hope-based trading.
Table of Contents
- What Entry Confirmation Rules Actually Mean
- A Practical Confirmation Checklist You Can Copy
- Confirmation Signals Explained: Volume, Structure, Momentum, and Candles
- Order Types and Execution Rules That Protect a Confirmed Entry
- Build Your Own Entry Confirmation Rules: Three Templates
- How Big Move Algo Fits Into a Confirmation Workflow
- Why Disciplined Confirmation Beats Chasing Perfect Signals
- Trade Big Move Algo’s Structured Signals With Confidence
- Sources
- FAQ
What Entry Confirmation Rules Actually Mean
Entry confirmation is the practice of requiring a second, independent piece of evidence before you act on a trading signal. If price breaks above resistance, that’s your trigger. Confirmation is what tells you the breakout is real: a volume spike, a retest that holds, or a close above the level on the next candle instead of an immediate reversal.
Here’s where most beginners get it wrong. They confuse confirmation with confluence. Confluence is stacking multiple tools that all say the same thing (three moving averages, two oscillators, and a trendline that all point to “uptrend”) which often just means you’re using five ways to describe one idea. Real confirmation comes from a different category of information entirely. If your trigger is a chart pattern, your confirmation should come from volume, momentum, or market structure, not another chart pattern that’s really just measuring the same price action twice.
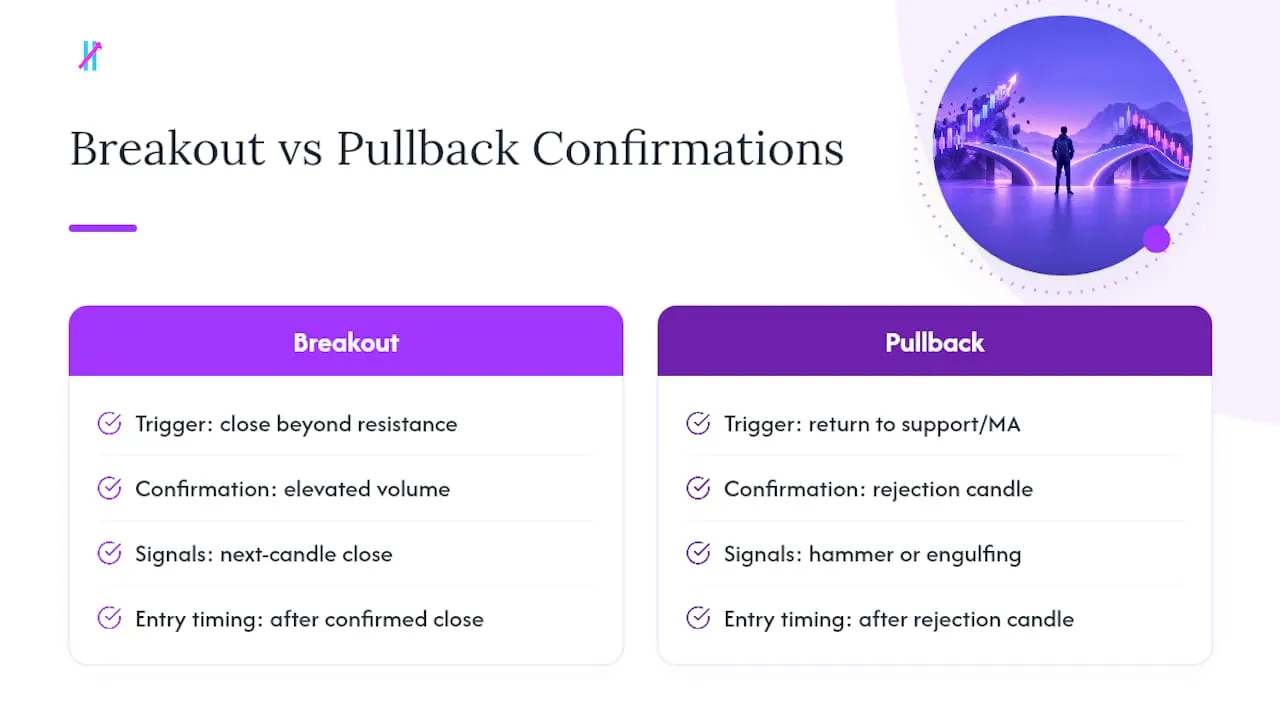
Take a breakout versus a pullback. A breakout confirmation might require the candle to close beyond the level with elevated volume compared to the recent average, showing real participation behind the move. A pullback confirmation looks different: price returns to a prior support or moving average, and you wait for a rejection candle (a hammer, a bullish engulfing bar) before entering, rather than buying the first touch. Both are valid. Neither works if you skip the wait.
Confirmation also does something less obvious: it forces pre-trade planning. You can’t confirm a signal if you haven’t defined what you’re confirming against, which means you’re forced to write down your entry level, your invalidation point, and your stop before the trade happens instead of during the adrenaline spike after it. That sequencing, plan first, act second, is the actual risk control. The CME Group’s education on trade and risk management makes the same point from an institutional angle: before you enter anything, you need to know your exact exit and confirm the position fits your account size and risk tolerance. Confirmation rules are how retail traders build that same discipline into a system instead of relying on willpower in the moment.
A Practical Confirmation Checklist You Can Copy
A checklist only works if every item has a pass or fail answer, not a feeling. Vague rules like “wait for a good setup” collapse the first time you’re staring at a chart with money on the line. Here’s a six-step filter that removes the guesswork.
- Check higher-timeframe alignment. Before you look at your entry timeframe, confirm the higher timeframe trend or context supports the trade direction. A bullish setup on the 15-minute chart means little if the 4-hour chart is in a clear downtrend running into resistance.
- Predefine your exact entry level and execution rule. Write the specific price or condition that triggers entry, not “somewhere around” a level. Decide in advance whether you’ll enter on a break, a close, or a retest.
- Require one independent confirmation from a different signal category. If your trigger is price structure, confirm with volume or momentum, not another structure-based tool measuring the same thing twice.
- Define stop-loss location and convert it to dollar risk. Measure the distance from entry to stop, then multiply by position size to get your dollar risk. This is the step most beginners skip, and it’s the one CME Group’s risk management guidance treats as non-negotiable before any trade goes live.
- State the invalidation condition that cancels the setup. Decide what price action or time window makes the trade idea wrong, so you’re not rationalizing a bad entry after the fact.
- Check execution conditions: spread, volume, and liquidity. A confirmed signal in a thin, wide-spread market can cost you more in slippage than the edge is worth.
That sixth step gets skipped constantly. Traders nail the technical analysis and then place a market order into a low-liquidity session, giving back half their edge to spread alone.
Pro Tip: Write your six checklist answers on a sticky note or a trading journal entry before you place the order, not after. If you can’t fill in all six honestly, you don’t have a confirmed entry, you have a hope.
Risk-per-trade in dollars matters more than most retail traders realize, a concept detailed in Timing the market isn’t real estate investing which emphasizes discipline and managing risk effectively rather than attempting to time entries perfectly. Percentage-based risk sounds precise, but converting to dollars is what actually maps to your margin requirements and how much of a losing streak your account can survive. A trader risking $200 per trade on a $10,000 account is making a very different bet than one risking $200 on a $2,000 account, even if both call it "
risk." The dollar figure is what your broker, and your drawdown, actually feel.
Confirmation Signals Explained: Volume, Structure, Momentum, and Candles
Not all confirmation tools carry equal weight, and pairing two from the same family just doubles up on the same information. Here’s how the major categories actually function and where each one falls short.
- Volume confirmation. A breakout with volume at 1.5 times or more above the recent average suggests real buying or selling pressure behind the move. Weak follow-through volume on the next one to three candles after a breakout is a red flag that the move may fail. Volume alone won’t tell you direction, only conviction.
- Market structure confirmation. This means watching for a genuine shift, like a higher low forming after a downtrend, or price accepting a new value area rather than briefly poking into it. Structure confirmation works best when checked against a higher timeframe; a shift on a 5-minute chart inside a strong daily downtrend is noise more often than not.
- Momentum indicators. RSI crossing above 50 alongside a price breakout adds weight to a bullish trigger; RSI staying below 40 on a “breakout” is a warning the move lacks strength. MACD line crossing above the signal line confirms trend acceleration, but treat a crossover deep in overbought territory with more caution than one near the zero line.
- Moving averages. A price close above a key moving average, not just a brief touch, is a more reliable confirmation than a crossover between two averages, which tends to lag. Match the moving average’s period to your timeframe: a 200-period average means something different on a 5-minute chart than on a daily one.
- Candlestick confirmation. Close-location matters more than the candle’s shape alone. A bullish rejection candle with a long lower wick and a close in the top third of its range at a support level carries more weight than the same wick with a close near the middle. Engulfing bars work the same way: the second candle needs to close beyond the body of the first, not just overlap it.
- Liquidity and fake-breakout cues. Long wicks that pierce a level and snap back within one or two candles usually mean stop hunting or a liquidity grab, not a genuine breakout. Waiting for price to hold beyond the level for a full candle close filters out a large share of these traps.
The practical move is pairing signals from different families. Trend plus volume, or structure plus momentum, tends to filter noise without cutting your trade frequency to zero, which is exactly what happens when traders stack four or five confirmations from overlapping categories, a point echoed in dual confirmation trading methodology.
Order Types and Execution Rules That Protect a Confirmed Entry
A perfectly confirmed entry still fails if the order type behind it works against you. Stop orders convert to market orders the instant they’re triggered, and in a fast-moving market that means your actual fill can land well away from your intended price. The SEC’s investor guidance on stop orders is direct about this: if price certainty matters to you, a stop-limit order, which sets a floor or ceiling on your fill price, is the safer choice over a plain stop.
Order timing instructions matter just as much:
- Day orders cancel automatically at the close, useful for intraday confirmed entries you don’t want to carry overnight risk.
- GTC (good-till-canceled) orders stay live until filled or manually canceled, but broker-specific policies vary on auto-cancel windows, so check your platform’s rules before assuming a GTC order sits indefinitely.
- IOC (immediate-or-cancel) fills whatever portion it can immediately and cancels the rest, useful in fast markets where partial fills beat no fill.
- FOK (fill-or-kill) requires the entire order to execute immediately or it cancels outright, which suits traders who need an all-or-nothing entry at a specific size.
Regulators have pushed brokers toward safer defaults. FINRA’s Regulatory Notice 16-19 recommends firms consider making stop-limit orders the default choice and disclose stop-order risks clearly, precisely because plain stop orders have burned retail traders during volatility spikes.
To cut slippage on a confirmed entry, favor limit orders during your confirmation window rather than chasing price with a market order, and avoid placing new entries in the first or last few minutes of a session when spreads widen. Also check your account mechanics: frequent intraday trading triggers margin minimums and T+1 settlement rules that can quietly restrict your buying power if you’re not tracking them.
Build Your Own Entry Confirmation Rules: Three Templates
Writing your own rules forces the ambiguity out of your trading before it costs you money. Follow this sequence, then copy one of the templates below as a starting point.
- Pick one primary signal and one confirmation from a different category. Trend plus momentum, or structure plus volume, is the practical sweet spot; more than two conditions usually just kills your trade frequency without meaningfully improving win rate.
- Define your stop and convert it to dollar risk. Distance from entry to stop, multiplied by position size, equals your dollar risk, the same formula CME Group’s education treats as mandatory before any trade.
- Set invalidation conditions, max position size, and a drawdown threshold. Decide in advance what price action kills the idea and what daily or weekly loss stops you from trading altogether.
- Pick a template and fill in your parameters:
- Breakout: Price closes beyond resistance with volume ≥ 1.5x average → confirm with RSI above 50 → stop below the breakout candle’s low.
- Pullback: Price returns to the 50-period moving average → confirm with a bullish rejection candle closing in the top third of its range → stop below the rejection candle’s low.
- Swing: Higher timeframe shows a structure shift (higher low) → confirm with MACD crossing above signal line → stop below the recent swing low.
- Paper-trade or backtest the rule set for at least 20 to 30 trades before going live, tracking win rate, average risk-to-reward, and how often the confirmation step actually saved you from a bad entry.
Pro Tip: Keep a simple spreadsheet with one row per trade: trigger, confirmation used, stop distance, dollar risk, and outcome. After 20 trades, you’ll see exactly which confirmation pairing is pulling its weight and which one is just noise.
For a deeper look at verification techniques before you commit capital, see how to verify a trading signal before entering a trade.
How Big Move Algo Fits Into a Confirmation Workflow
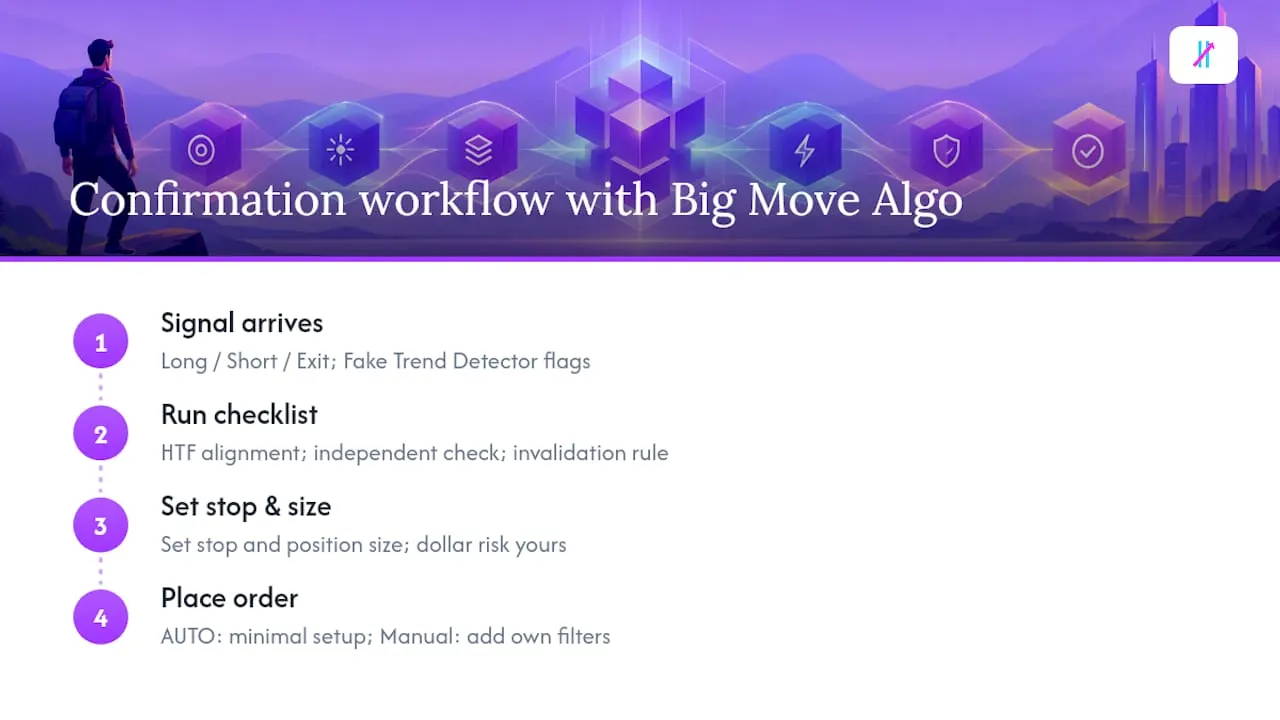
A structured indicator can’t replace your checklist, but it can speed up the parts that are mechanical. Big Move Algo issues Long, Short, and Exit signals in real time, and its built-in Fake Trend Detector is built specifically to flag the low-quality conditions where a signal shouldn’t be trusted without extra scrutiny, functioning as one layer of your independent confirmation.
The workflow looks like this: a signal arrives, you run it against your checklist (higher-timeframe alignment, an independent confirmation, defined invalidation), then you set your stop and position size before touching the order ticket. AUTO Mode keeps setup minimal for traders who want structured signals fast; Manual Mode gives more experienced traders room to layer in their own filters. Either way, the stop and dollar risk calculation stay entirely yours. No indicator, including this one, replaces that step.
Why Disciplined Confirmation Beats Chasing Perfect Signals
Survivorship in trading has almost nothing to do with finding a flawless setup and everything to do with how few undisciplined trades you let through the door. Traders who wait for genuine, independent confirmation take fewer trades, but the ones they take are rule-verified rather than emotionally justified after the fact.
The uncomfortable truth is that most blown accounts weren’t killed by bad signals. They were killed by good signals traded without a predefined stop, or by confirmed setups oversized because the trader felt certain. Start today by writing down your own six-step checklist and refusing to trade without checking every box, even when a setup feels obvious.
— Steven Hartwell
Trade Big Move Algo’s Structured Signals With Confidence
A structured indicator can provide a consistent, repeatable signal that doesn’t shift its criteria based on how you’re feeling that day. Where discretionary confirmation depends on your mood and screen time, such an indicator’s signals plus a Fake Trend Detector can apply the same filter every single time, in AUTO Mode for speed or Manual Mode for traders who want to layer in their own rules.
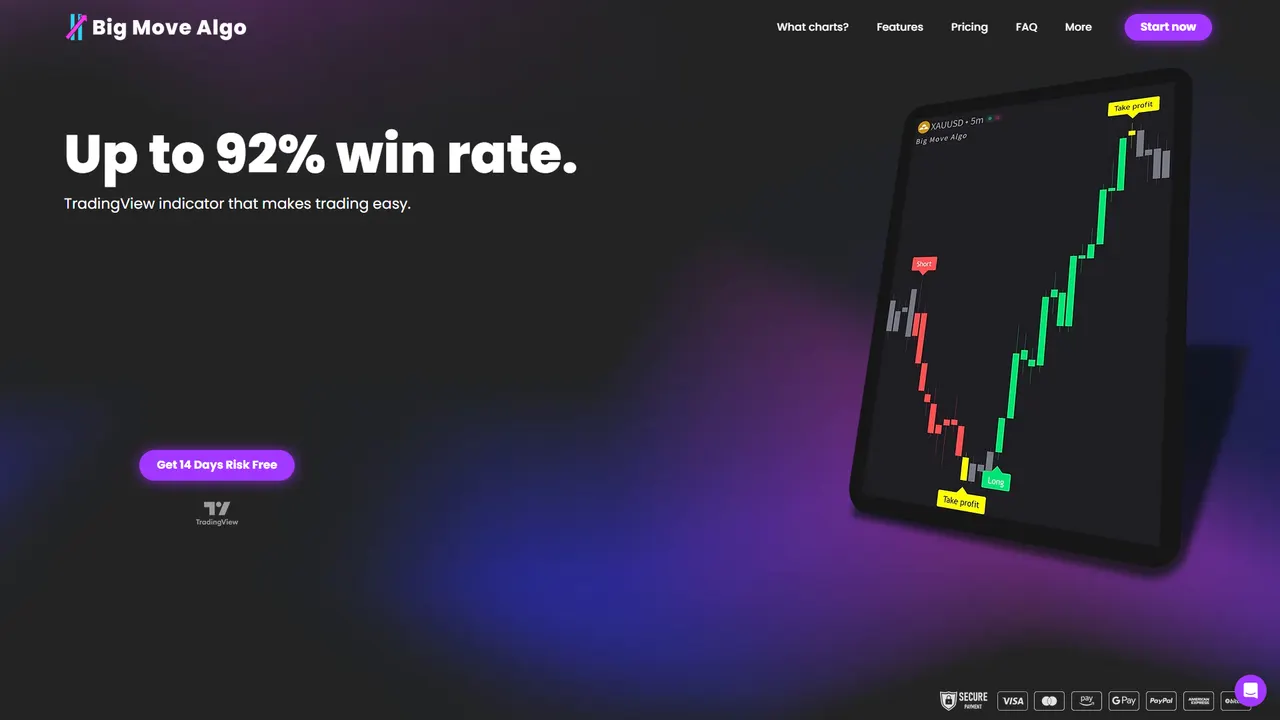
That structure maps directly onto the checklist covered above: the signal gives you the trigger, the Fake Trend Detector helps filter out the conditions where confirmation is weakest, and you still control your stop, your dollar risk, and your invalidation rule independent of anything the software outputs. It can work across crypto, forex, stocks, indices, and commodities on multiple devices, allowing the same rule set to travel with you across markets. If you want a repeatable signal layer to plug into your own confirmation rules, check the plans and pricing and get instant access after signup.
Sources
FAQ
What is the 3-5-7 rule in trading?
The 3-5-7 rule is an informal risk-management guideline suggesting a trader risk no more than 3% of capital on any single trade, keep total exposure across all open trades under 5%, and target a risk-to-reward ratio that yields around a positive net profitability on winning positions. It’s not a regulatory standard, just a popular heuristic for keeping position sizing conservative alongside your entry confirmation rules.
What is an entry confirmation candlestick and when does it appear?
An entry confirmation candlestick is a candle that closes in a way that validates your trade trigger, such as a bullish engulfing bar at support or a rejection wick with a close in the upper third of its range. It typically appears right after your primary signal, on the candle following a breakout or a retest, and you wait for its close before entering rather than acting mid-candle.
When must a trade confirmation be sent?
In a retail trading context, “confirmation” usually refers to your own entry validation step, which should happen before you place the order, not after. For brokerage trade confirmations (the official record of an executed trade), timing and settlement details are governed by your broker and fall under rules like FINRA’s frequent intraday trading guidance, which covers T+1 settlement for equities.
What is the 90% rule in forex?
The 90% rule is an informal claim that a large majority of new forex traders lose money within their first few months, often citing overleveraging and a lack of defined entry rules as the main causes. It’s a widely repeated statistic in retail trading circles rather than a formal regulatory figure, and it underscores why confirmed entries with defined stops matter more than chasing frequent trades.