
How to Set Up TradingView Indicator Alerts
- Steven Hartwell

- Jun 27
- 7 min read

A TradingView alert is an automated notification that fires when a specific market condition is met on your chart. When you set up TradingView indicator alerts correctly, you stop watching screens all day and start acting only when your technical conditions are actually triggered. That shift alone separates reactive traders from disciplined ones. This guide covers every step, from account prerequisites to notification settings, plus the troubleshooting traps that catch most traders off guard.
How to set up TradingView indicator alerts: what you need first
Before you create a single alert, three things must be in place: the right account plan, an active indicator on your chart, and a basic understanding of the alert manager.
TradingView’s free plan supports a limited number of active alerts at one time. Paid plans (Essential, Plus, Premium, and Ultimate) increase that cap significantly. If you trade multiple instruments across multiple timeframes, a paid plan is not optional. It is the only way to keep enough alerts active simultaneously.
Adding an indicator is the next step. Click the Indicators button at the top of the chart, search for your chosen study (RSI, MACD, Bollinger Bands, or a custom script), and apply it. The indicator must be visible on the chart before TradingView will let you select it as an alert source. You cannot create alerts for TradingView indicators that are not already loaded.

The alert manager lives under the Alerts clock icon in the right sidebar. You can also open the alert creation dialog instantly with Alt + A on Windows or Option + A on Mac. That shortcut is worth memorizing. Traders who set alerts frequently save real time with it.
Tool or requirement | Purpose | Notes |
TradingView account (paid) | Increases active alert limit | Free plan has a low cap |
Indicator applied to chart | Required alert source | Must be visible before alert creation |
Alert manager (sidebar) | Manage, edit, delete alerts | Accessible via clock icon |
Alt + A / Option + A | Opens alert dialog instantly | Works on Windows and Mac |
Pine Script (optional) | Custom alert conditions | Requires global scope placement |
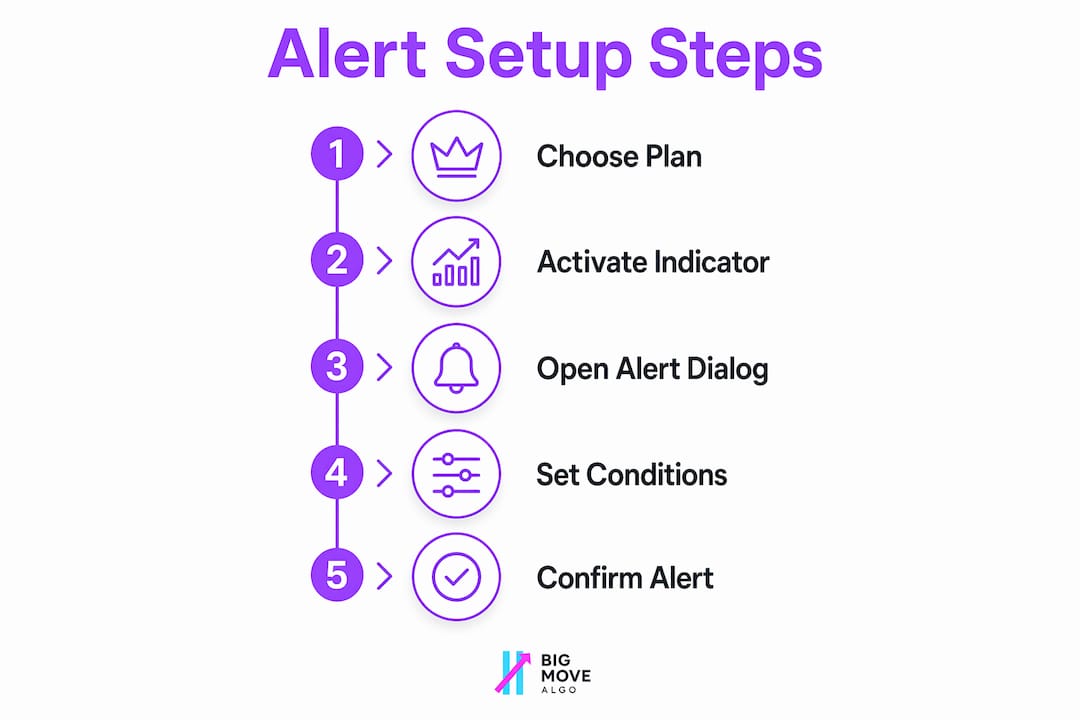
Step-by-step process to create TradingView indicator alerts
Setting up an indicator alert takes about 2 minutes once your indicator is on the chart. That is longer than a simple price alert, which takes roughly 30 seconds, but the added specificity is worth it.
Apply your indicator. Load RSI, MACD, Bollinger Bands, or any custom script onto the chart. Confirm it is rendering correctly before proceeding.
Open the alert dialog. Click the Alerts button in the top toolbar, use the Alt + A shortcut, or right-click directly on the indicator line and select “Add Alert on [Indicator Name].” The right-click method pre-fills the indicator source automatically.
Select the indicator as the condition source. In the “Condition” dropdown, choose your indicator by name. A second dropdown appears showing the specific output line you want to monitor, such as RSI, Signal Line, or Upper Band.
Set the trigger condition. Choose the logical relationship: “crossing,” “crossing up,” “crossing down,” “greater than,” or “less than.” For RSI overbought alerts, set the condition to “crossing above 70.” For MACD, set it to “MACD crossing Signal Line.” These are the most common entry-signal configurations.
Configure the notification method. Select push notification, email, browser pop-up, webhook, or sound. You can enable multiple methods at once.
Name the alert and write a message. Clear alert names reduce confusion when multiple alerts fire at once. Use a format like “BTC/USD RSI Cross 70 4H” so you know the asset, condition, and timeframe at a glance.
Set the expiration date and save. TradingView alerts expire by default. Set a custom expiration or choose “Open-ended” if available on your plan. Click Create to activate.
Pro Tip: Right-clicking directly on an indicator line and selecting “Add Alert” pre-fills the source and condition fields. This cuts setup time in half compared to opening the dialog from scratch.
How does alert frequency affect signal reliability?
Alert frequency is the setting most traders overlook, and it is the one that causes the most false signals. TradingView offers four main frequency options.
Once Per Bar Close fires only when a candle fully closes with the condition met. This is the recommended setting for indicator alerts because it confirms the signal on completed data. Intrabar price swings will not trigger it prematurely.
Once Per Bar fires the first time the condition is met within a bar, even if the bar is still forming. This works for scalpers who need speed, but it generates more false signals because incomplete bars can briefly satisfy a condition and then reverse.
Once Per Minute fires repeatedly as long as the condition holds, once per minute. This suits monitoring alerts where you want continuous reminders, not entry signals.
Only Once fires a single time and then deactivates. Use this for one-time level breaks you do not want repeated.
Frequency setting | Best use case | False signal risk |
Once Per Bar Close | Indicator-based entry signals | Low |
Once Per Bar | Scalping, speed-sensitive alerts | Medium |
Once Per Minute | Monitoring, status alerts | High |
Only Once | One-time level or event alerts | None (fires once) |
TradingView provides six notification delivery methods: app push notifications, browser pop-ups, email, webhook, sound alerts, and email-to-SMS. Each serves a different trading style.
App push notifications work best for mobile traders who are away from their desk.
Browser pop-ups suit traders who are actively watching charts and want an immediate visual cue.
Email is reliable for lower-frequency alerts where a slight delay is acceptable.
Webhook connects TradingView to external platforms, bots, or automation tools. This is the method used for algorithmic execution.
Sound alerts add an audio layer for traders who keep charts open in the background.
Email-to-SMS converts email alerts into text messages, useful when app notifications are not available.
Common issues when configuring TradingView notifications
Most alert failures trace back to one of three causes: a Pine Script scoping error, a misunderstanding between two alert functions, or an expired alert that was never renewed.
In Pine Script, alertcondition() must be placed in the global scope. Placing it inside an if block, a function, or a loop breaks it silently. TradingView will not show an error. The alert simply will not appear as an option in the condition dropdown. If your custom indicator’s alert conditions are missing from the dialog, this is almost always the reason.
The second common mistake involves confusing alertcondition() with alert(). These serve different purposes: alertcondition() registers a named template that traders can select in the UI, while alert() fires programmatically with dynamic messages built into the script logic. Using one when you need the other produces alerts that either never appear in the UI or fire at unexpected times.
Expired alerts are the third issue. TradingView alerts have a default expiration window. When an alert expires quietly, traders assume the market condition never triggered. Check the alert manager regularly and renew or extend alerts that are approaching their expiration date.
Alert presets solve the repetition problem for traders who configure the same alert settings across multiple charts. A preset saves your notification methods, frequency, and message template so you can deploy consistent configurations without re-entering every field manually.
Pro Tip: Save a preset for each indicator you use regularly. Name it by indicator and timeframe (e.g., “RSI 4H Standard”). When you add a new chart, apply the preset and you are done in seconds.
Key takeaways
Setting up TradingView indicator alerts correctly requires the right account plan, proper indicator placement, and the Once Per Bar Close frequency setting to avoid false signals.
Point | Details |
Account plan matters | Paid plans unlock higher active alert limits needed for multi-market monitoring. |
Indicator must be on chart | TradingView cannot create alerts for indicators that are not already applied and visible. |
Once Per Bar Close is standard | This frequency confirms signals on completed candles and filters out intrabar noise. |
Name alerts clearly | A format like “BTC/USD RSI 70 4H” makes alerts immediately readable when they fire. |
Use presets for efficiency | Alert presets let you deploy consistent configurations across charts without repeated manual setup. |
Why most traders set up too many alerts
Analyst Andreas Maratheftis makes a point that most traders learn the hard way: alerts without a clear plan reduce their usefulness rather than increase it. A notification is only as good as the decision it prompts.
I have watched traders build 40-alert setups across a dozen instruments and then freeze when three alerts fire at the same time. The problem is not the platform. The problem is that alerts were set without a defined response for each one. If you do not know exactly what you will do when an RSI crosses 70 on the 4-hour chart, that alert is noise, not signal.
My approach is to set alerts only for conditions that map directly to a trade I am prepared to take. That means one alert per setup, not one alert per indicator per timeframe per asset. The right trading signals guide reinforces this: specificity beats volume every time.
The other mistake I see constantly is setting alerts on the wrong frequency. Traders use “Once Per Bar” because it feels faster, then wonder why they get five notifications on a single candle. Switching to “Once Per Bar Close” alone cuts alert fatigue dramatically. Fewer, higher-quality notifications produce better decisions than a constant stream of maybes.
— Steven Hartwell
Big Move Algo and TradingView alerts working together
Alerts become far more useful when the underlying signal is already filtered for quality. Big Move Algo is a proprietary TradingView indicator that delivers Long, Short, and Exit signals in real time across crypto, forex, stocks, indices, and commodities.
Its built-in Fake Trend Detector filters out low-quality market conditions before a signal is generated, which means the alerts you set on Big Move Algo signals fire on conditions that have already passed a quality check. You are not alerting on raw RSI crosses. You are alerting on confirmed, filtered signals. The how-to guide walks through the full alert configuration process for Big Move Algo specifically. For traders who want a cleaner, faster setup, Big Move Algo’s trading signals are available through subscription with instant access after purchase.
FAQ
What is a TradingView alert?
A TradingView alert is an automated notification that fires when a price, indicator, or drawing condition you define is met on a chart. It removes the need to watch markets continuously.
What alert frequency should I use for indicator alerts?
Use “Once Per Bar Close” for indicator-based alerts. This setting confirms the condition on a completed candle and avoids false signals from intrabar price swings.
Why is my Pine Script alert condition not showing in the dialog?
The most common cause is placing alertcondition() inside an if block or function. It must be in the global scope of the script for TradingView to register it as a selectable condition.
How many alerts can I have active on TradingView?
The number of active alerts depends on your plan. Free accounts have a low cap, while paid plans (Essential through Ultimate) allow significantly more simultaneous active alerts.
What is the fastest way to open the alert creation dialog?
Press Alt + A on Windows or Option + A on Mac. This keyboard shortcut opens the alert dialog instantly without navigating through menus.
Recommended
Comments