
Checklist-First Range-Bound Strategy Traders Can Automate (1:2 R:R)

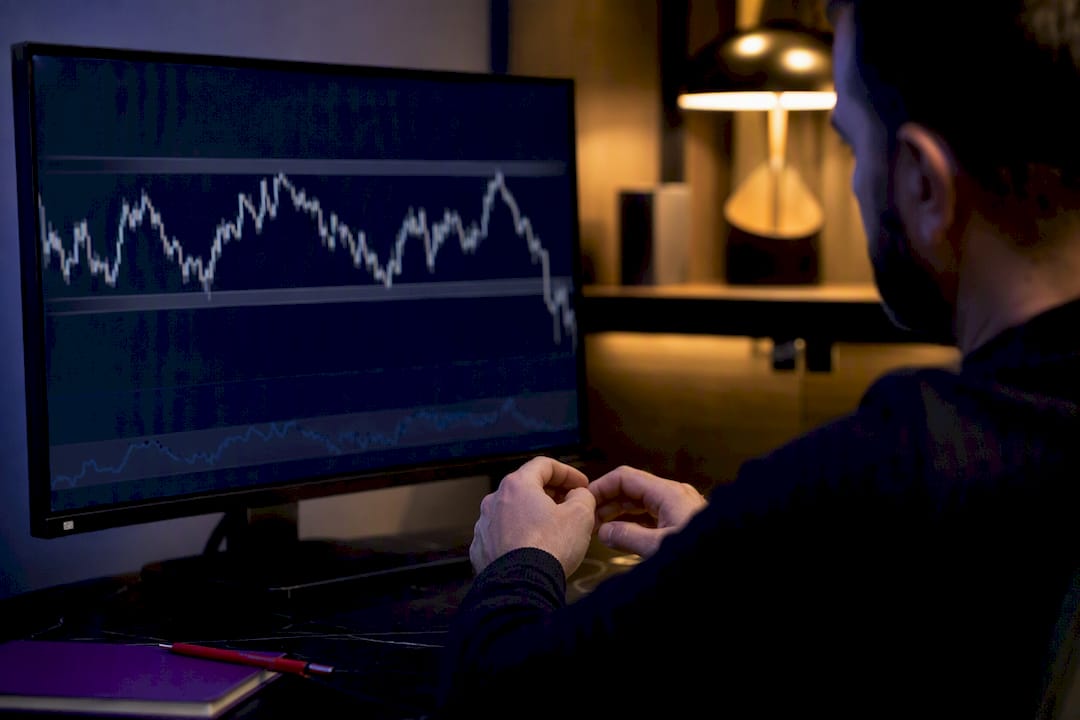
Use a range-bound strategy when price keeps oscillating between clear support and resistance with no rising trend strength behind it. The setup itself is simple: buy near support after a confirmation candle, sell near resistance on the same kind of signal, and put your stop just outside the zone, not inside it. What separates traders who profit from this from those who get chopped up is one habit: writing down the exact price and condition that proves the range is dead before you place the first trade.
TL;DR:
Range trading is most effective when ADX readings stay below 25, indicating weak trend strength that supports bouncing between support and resistance.
Confirm the boundaries with at least two touches and genuine reactions before placing trades, while avoiding narrow ranges that don’t exceed transaction costs.
Entries should be made only after a candle confirmation at the boundary combined with oscillator extremes, with stops placed just outside the zone to survive normal noise.
Lock in profits by taking partial gains at the midpoint of the range and move stops to breakeven once the trade moves in your favor.
Avoid trading the range middle, drawing lines instead of zones, or ignoring upcoming news, as these mistakes quietly cause most losses in range-bound trading.
Table of Contents
What Range-Bound Trading Actually Means
A trading range is a market condition where price bounces between a defined support level and a defined resistance level instead of climbing or falling in a sustained direction. Traders buy near the lower boundary and sell near the upper one, placing stop-loss orders beyond the range to cap losses if price breaks free. That’s the entire premise of a range trading strategy: you’re betting on reversal, not continuation, every single time you click “buy” or “sell.”
This works because markets spend a lot of their life going nowhere. Trends get the headlines, but consolidation is where price often parks between major moves, digesting the last leg before deciding on the next one. That has a direct payoff for you: more setups, more often, in almost any market you follow, from EUR/USD to a mid-cap stock to crude oil futures.
Range trading and trend trading are built on opposite assumptions, and mixing them up is where most losses come from.
Trend trading assumes price will keep moving in one direction, so you buy strength and sell weakness.
Range trading assumes price will snap back toward the middle, so you sell strength near resistance and buy weakness near support.
Applying trend logic (buying breakouts) inside a range gets you chopped by false moves.
Applying range logic (fading extremes) during a real trend gets you run over by momentum.
The failure mode is almost always the same: a trader keeps buying support on a market that has already transitioned into a downtrend, because the chart “used to” range there. Knowing which mode you’re in matters more than any indicator setting you choose.
How to Identify a Tradable Range
Not every sideways-looking chart is worth trading. A lot of what looks like consolidation is actually a slow trend in disguise, and trading it like a range gets expensive fast. Run through this checklist before committing capital:
Check ADX first. A reading below roughly 25 suggests the market lacks trend strength, which is the baseline condition for range trading. Above that, breakout risk climbs and you should lean toward trend-strength tools instead of fading extremes.
Look for flat, tangled moving averages. When the 20, 50, and 100-period moving averages are crossing over each other with no clear slope, that’s consolidation, not indecision before a trend leg.
Watch for a Bollinger Bands squeeze. Bands pulling tight around price confirm falling volatility, which usually lines up with a low ADX reading.
Confirm structure with real touches. You need at least two genuine reactions off each boundary, and those boundaries should be zoned a few pips or points wide, not single lines drawn with a ruler.
Check that the range is wide enough to trade. A range should be roughly three times your planned stop distance so spread and commissions don’t eat the trade before it starts.
Confirm volume and liquidity are normal. Thin, erratic volume near the boundaries is a warning that the next touch could break rather than bounce.
Skip any of these and you’re not trading a range. You’re guessing.
Entry, Confirmation, Stop, and Target Rules That Actually Repeat
This is the part most guides gloss over, and it’s the part that determines whether you make money. A range trading strategy only works if your entries are mechanical, not emotional.
Long entries at support. Wait for price to tag the support zone, then wait again for a confirmation candle: a hammer, a bullish engulfing bar, or a strong close well off the lows. Pair that with an oscillator reading oversold, RSI under 30 or stochastic under 20, and you have a real signal instead of a guess. Enter after the confirmation candle closes, not mid-candle. Jumping in early is how a “bounce” turns into a losing trade the moment price keeps falling through your entry.
Short entries at resistance. Mirror the logic. Look for a bearish rejection candle, a shooting star or bearish engulfing pattern, at the resistance zone, combined with RSI above 70 or stochastic above 80. Enter short after that candle closes.
Why the middle of the range is a weak zone. Price in the middle of a range has no nearby boundary to react against and no oscillator extreme to confirm a reversal. Trades taken there have a mediocre risk-reward profile no matter how the chart looks, because you’re paying full stop distance for a fraction of the potential reward. Save your capital for the edges.
Stop and target placement.
Stops go just beyond the range boundary, past the wick extremes, with enough buffer to survive normal noise.
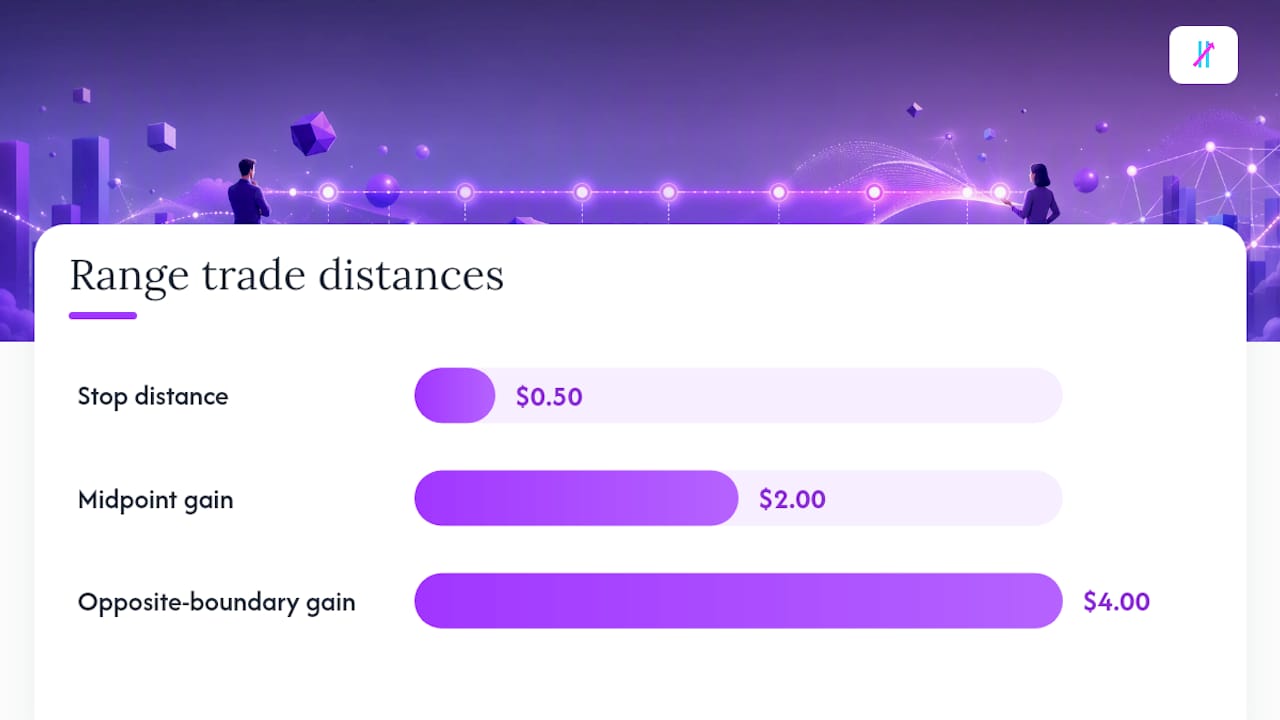
Take partial profits at the midpoint of the range. This locks in gains before the trade has to survive the full round trip.
Take the remaining position off between 80% and 90% of the way to the opposite boundary. Trying to squeeze out the last few points against resistance or support is where good trades turn into break-even ones.
Here’s how the math typically looks. Say support sits at $50.00, resistance at $54.00, and your stop sits at $49.50 (fifty cents of risk). A partial exit at the $52.00 midpoint locks in a 1:4 reward relative to your risk on that portion. Even a conservative version of this, exiting the whole position at the midpoint every time, still nets a 1:2 to 1:3 reward-to-risk ratio on a consistent basis, which is the range trader’s real edge.
Pro Tip: Backtest your exact entry and exit rules on historical data before risking real money. TradingView’s strategy tester lets you see how a specific range setup performed across dozens of past cycles in minutes, not weeks.
Position Sizing and Trade Management Rules
A good range trading setup can still lose money if the position sizing behind it is sloppy. These rules aren’t optional extras. They’re what keeps one bad breakout from erasing a month of small wins.
Place your stop beyond the zone, with a buffer. Beyond the range boundary means past the actual wick extremes of prior touches, not just past the round number everyone else is watching.
Size the position to a fixed risk percentage, commonly 1% to 2% of account capital per trade, calculated from entry to stop distance.
Set a minimum acceptable reward-to-risk ratio, typically 1:2, before entry. If the setup doesn’t clear that bar after accounting for spread, skip it.
Move the stop to breakeven once price reaches the midpoint. This protects the trade from turning into a loss after it’s already worked in your favor.
Reduce position size after the first two or three bounces off the same boundary. Each additional touch raises the odds the level finally breaks, so full-size entries belong on the earlier, more reliable reactions.
Cap correlated exposure. Don’t run four range trades on EUR/USD, GBP/USD, and two other dollar pairs simultaneously; a single dollar-driven move can trigger every stop at once.
Skipping a trade because the reward-to-risk doesn’t clear your minimum is not a missed opportunity. It’s the discipline that keeps you solvent for the setups that do qualify.
What to Do When the Range Breaks
Ranges end. The question is whether you have a rule ready before that happens or whether you’re improvising in real time.
A breakout deserves respect when volume expands noticeably and price closes beyond the boundary on more than one candle or session, not just a single spike that reverses by the close. A single wick poking through resistance on light volume is usually a trap, not a breakout, and traders who treat every boundary touch as a valid range trade get burned by exactly this pattern.
The safer entry after a genuine breakout isn’t chasing the initial move. It’s waiting for a retest: price pulls back to the old boundary, that former resistance now acts as support (or vice versa for a broken support level), and you enter once price confirms the flip with a rejection candle at the retested level.
Set these rules before you’re in the trade, not after:
Two consecutive closes beyond the zone on rising volume invalidates the range immediately.
Stop trading the range the moment invalidation triggers. Don’t average into a losing fade hoping the boundary holds a fifth time.
Shift your framework: check ADX again, and if it’s climbing past 25, move to a trend-following or breakout approach with its own entry and stop rules.
If the breakout fails and price snaps back inside the range, the old range is often still valid, but treat the next entry with extra caution since that failed breakout can trap late shorts or longs.
Mistakes That Quietly Destroy a Range Trader’s Account
Most range trading losses trace back to one of a handful of repeat offenders.
Trading the middle of the range because price “looks like” it’s turning, with no boundary or oscillator confirmation backing the trade.
Drawing lines instead of zones, then getting stopped out on normal wick noise that never actually violated the real support or resistance area.
Ignoring scheduled news or rising volatility, which can blow through both boundaries in minutes regardless of how clean the range looked the day before.
Trading ranges that are too narrow to clear spread and commission costs after a realistic stop distance.
Run this five-second checklist before every entry: clear zones with two-plus touches, ADX confirming low trend strength, acceptable spread and liquidity, a reward-to-risk ratio that clears your minimum, and no major news release imminent.
Pro Tip: Keep a simple trade log with just four columns: setup type, ADX reading at entry, R:R achieved, and outcome. After twenty trades, patterns in what’s actually working become obvious in a way memory alone never catches.
Turning the Checklist Into an Automated Workflow
Running six manual checks before every single trade is realistic for a handful of setups a week. It gets exhausting across multiple charts and timeframes, which is exactly the gap a rules-based TradingView indicator is built to close.
An indicator built around regime detection can cover several of these steps directly:
A built-in regime filter that mirrors the ADX threshold check, flagging when trend strength is low enough for range tactics to make sense.
Confirmation signals (Long, Short, Exit) that stand in for the candle-and-oscillator confluence you’d otherwise scan for manually.
A Fake Trend Detector designed to filter out the low-quality, choppy conditions where neither range nor trend rules perform reliably.
A practical workflow looks like this: let the tool flag the regime and confirmation, then place your stop beyond the zone yourself and size the position to your own risk percentage. No indicator replaces the judgment calls around liquidity, upcoming news, or whether the range is wide enough to trade. Treat any automated signal as one input in the checklist above, never the whole decision.
Traders who want to go a step further and build a fully tested, rules-based version of their own range logic can also look at a no-code algorithm platform to backtest and automate the exact entry and exit conditions they’ve defined by hand.
What Years of Watching Range Trades Actually Teaches You
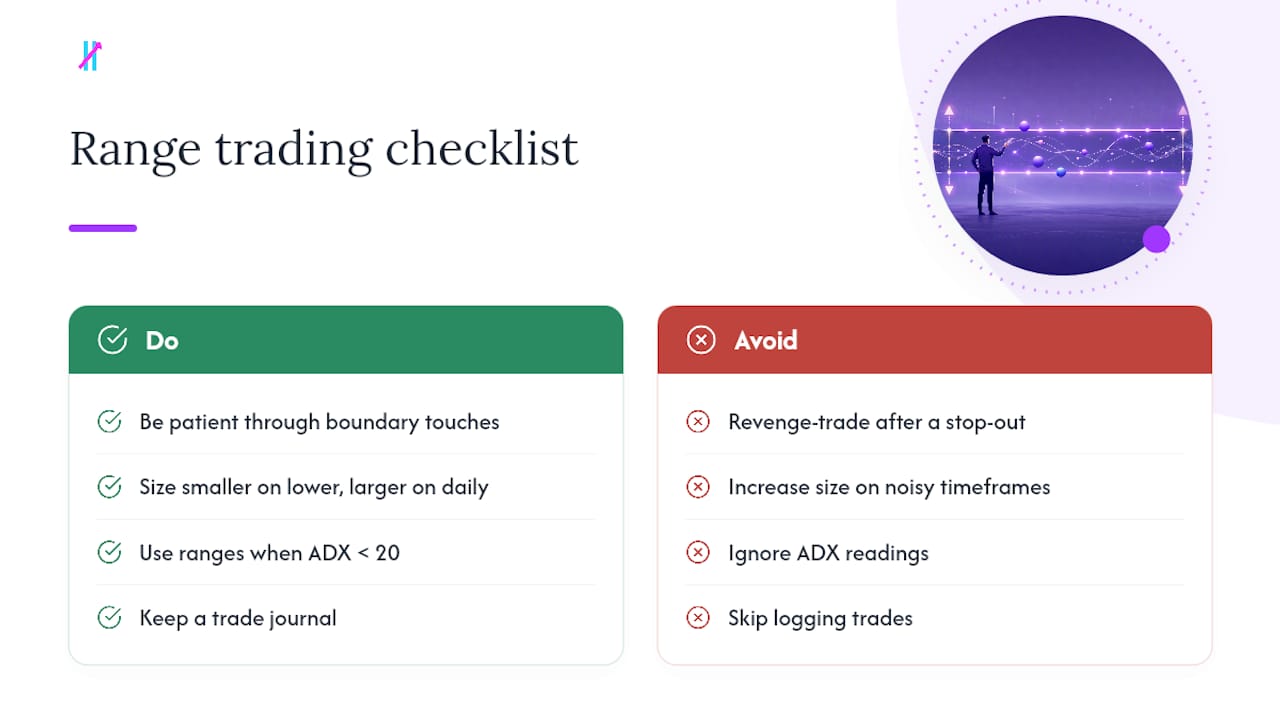
The lesson that took longest to sink in: range trading rewards patience more than skill. The setups themselves are simple. The hard part is sitting on your hands through three or four boundary touches that don’t quite qualify, then not revenge-trading the one that stops you out on a fake move.
On lower timeframes (15-minute, hourly), ranges form and break faster, so size down and expect more noise. On daily charts, a confirmed range tends to hold longer and rewards a bit more size per trade. I lean on range tactics almost exclusively when ADX sits comfortably under 20 and switch to trend tools the moment that number starts climbing. A trade journal isn’t optional here. It’s the only thing that shows you, in hindsight, whether your last stop-out was a bad market or a bad rule.
— Steven Hartwell
An Easier Way to Run the Range Checklist
Manually rechecking ADX, oscillator readings, and candle confirmations across several charts a day is where a lot of range traders burn out and start skipping steps. Big Move Guard is a TradingView indicator that automates regime detection and issues clear Long, Short, and Exit signals, with a Fake Trend Detector built in to filter out choppy conditions that produce false range signals.

It runs in AUTO Mode for minimal setup, or MANUAL Mode for more customization, and works across multiple markets on multiple devices. Before committing capital, check that your market’s typical range width and liquidity match what the checklist above calls for. You can see the current setup and start evaluating it for your own charts on the Big Move Guard product page.
Sources
For deeper background on the mechanics covered here, see Investopedia’s range trading definition, Fidelity’s range trading guide, and the setup breakdown at Pro Trading Insights.
This article is general information, not a substitute for advice from a qualified financial advisor. Consult a qualified financial professional about your own circumstances before acting on anything here.
FAQ
Is ADX Good for Range Trading?
Yes. ADX readings below roughly 25 signal weak trend strength, which is the baseline condition range traders look for before fading support and resistance.
Which Option Strategy Works Best in a Range-Bound Market?
Premium-selling strategies like iron condors and short strangles tend to perform best in range-bound markets because they profit from price staying between two boundaries rather than moving strongly in either direction.
What Is the 3-5-7 Rule in Trading?
It’s a position-sizing guideline suggesting no single trade risk more than 3% of capital, total open risk stay under 5%, and total exposure across all positions stay under 7%, though exact numbers vary by trader and account size.
How Do You Actually Execute a Range Trade Step by Step?
Confirm the range with an ADX reading under 25 and at least two touches per side, wait for a confirmation candle at the boundary with a supporting oscillator reading, enter on that candle’s close, and place your stop just beyond the zone.
What Happens if the Range Breaks While I’m in a Trade?
Exit immediately once you see two consecutive closes beyond the boundary on rising volume. That’s your predefined invalidation signal, not a level to wait out.
Recommended
Comments